Recreating the Bullet Journal in Roam Research


Until late last year I’d been a Bullet Journal user for a little over three years. It had become an indispensable tool for keeping me focused on work and reducing distractions by being a concrete place to externalise thoughts.
That all went out the window with the birth of my son and I quickly found that I was no longer able to spend the time or summon the energy to write everything down by hand, even if I’d somehow remembered to keep my notebook close by.
Instead, I had to devise a new system that relied on digital tools for their convenience and speed, ideally by recreating the best parts of the Bullet Journal method which had been working so well for me.
Enter Roam Research.
I’d been using Roam since the beginning of 2020, and it’s a remarkable service with the standout feature being the bidirectional linking of pages. Write something on one page and wrap it in double brackets [[like so]] and that itself becomes a page with the original text showing up on the new page as a linked reference.
Confused? Let me show you how to recreate a Bullet Journal in Roam.
Quick note — I’ve styled my Roam graph with some CSS but all the functionality is the same without any styling.
Setting up the Bullet Journal structure in Roam
If you know the Bullet Journal system, you know the core pillars are the Index, Future Log, Monthly Log, and Daily Log. Each of these can be easily recreated in Roam, though I’d skip the Index as it’s redundant when you have instant search.
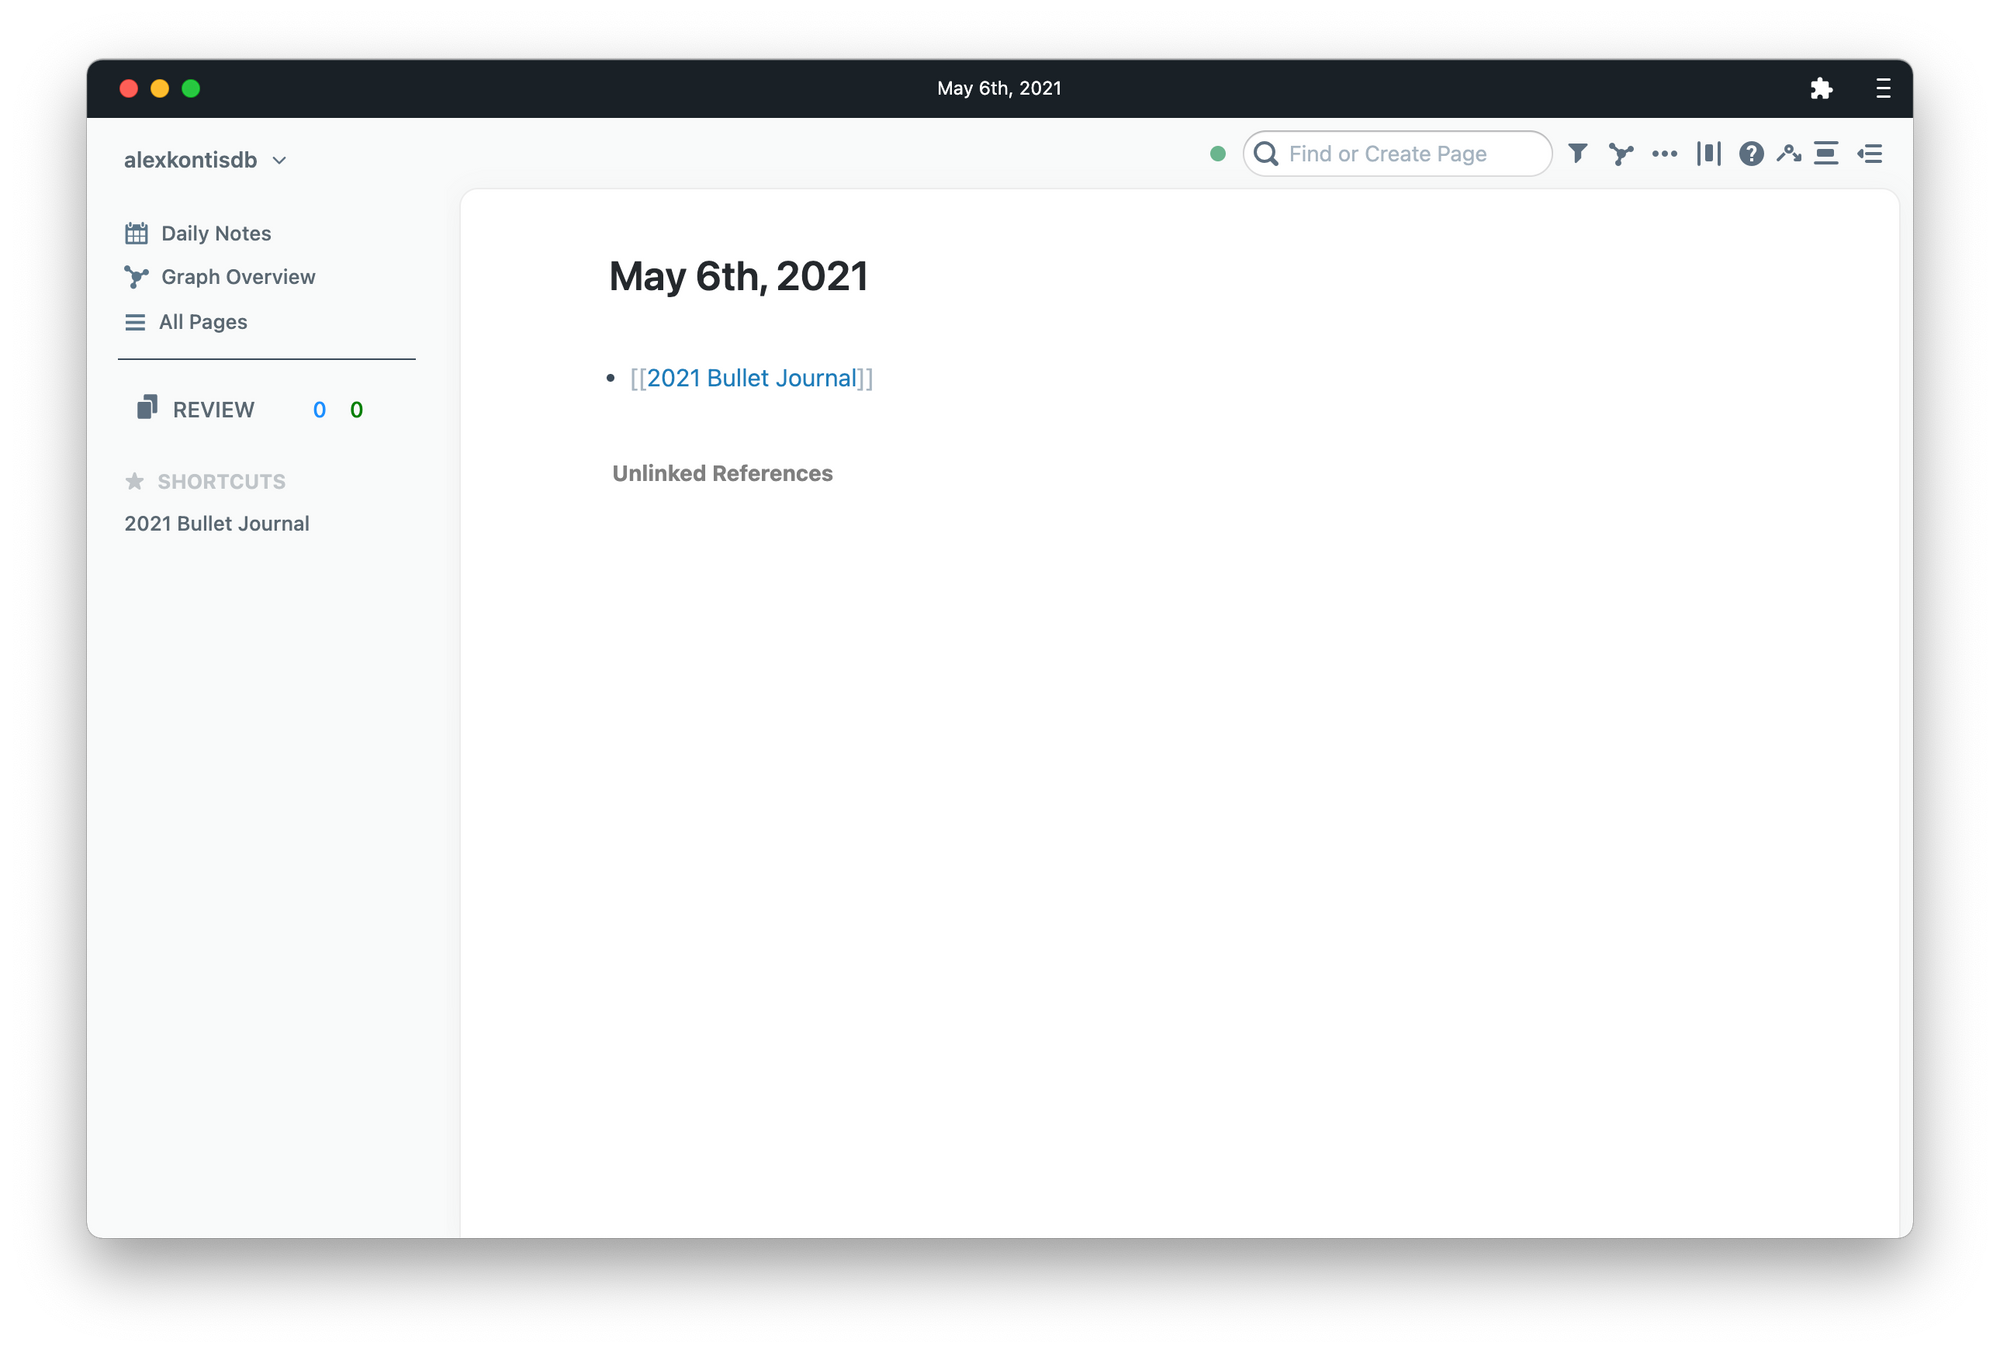
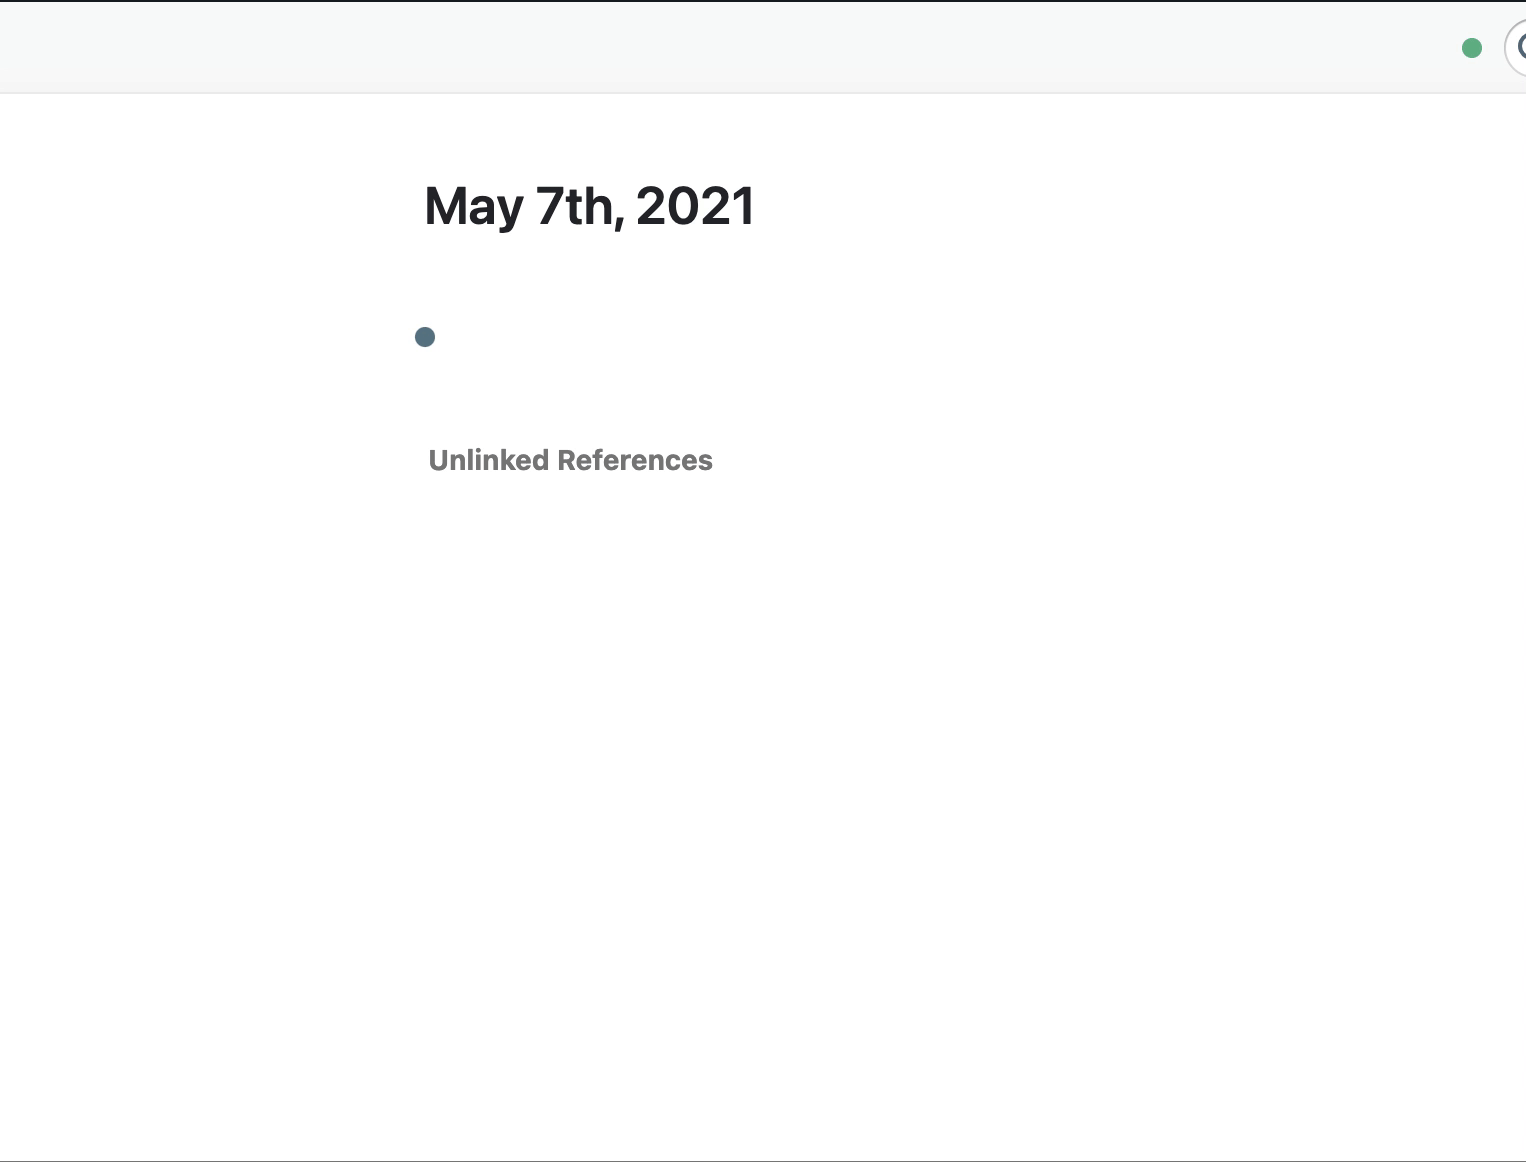
Roam starts with the Daily Notes Page (DNP). Every time you open Roam, whether it’s the first or the thousandth, it’s there, automatically generated for you each day. It’s the only concrete opinion that Roam has and from there it’s up to the user to make Roam whatever they want.
That’s the Daily Log taken care of without any work on our part! So let’s move to the Future Log.
From the DNP, start by typing [[ and give your Bullet Journal a title.
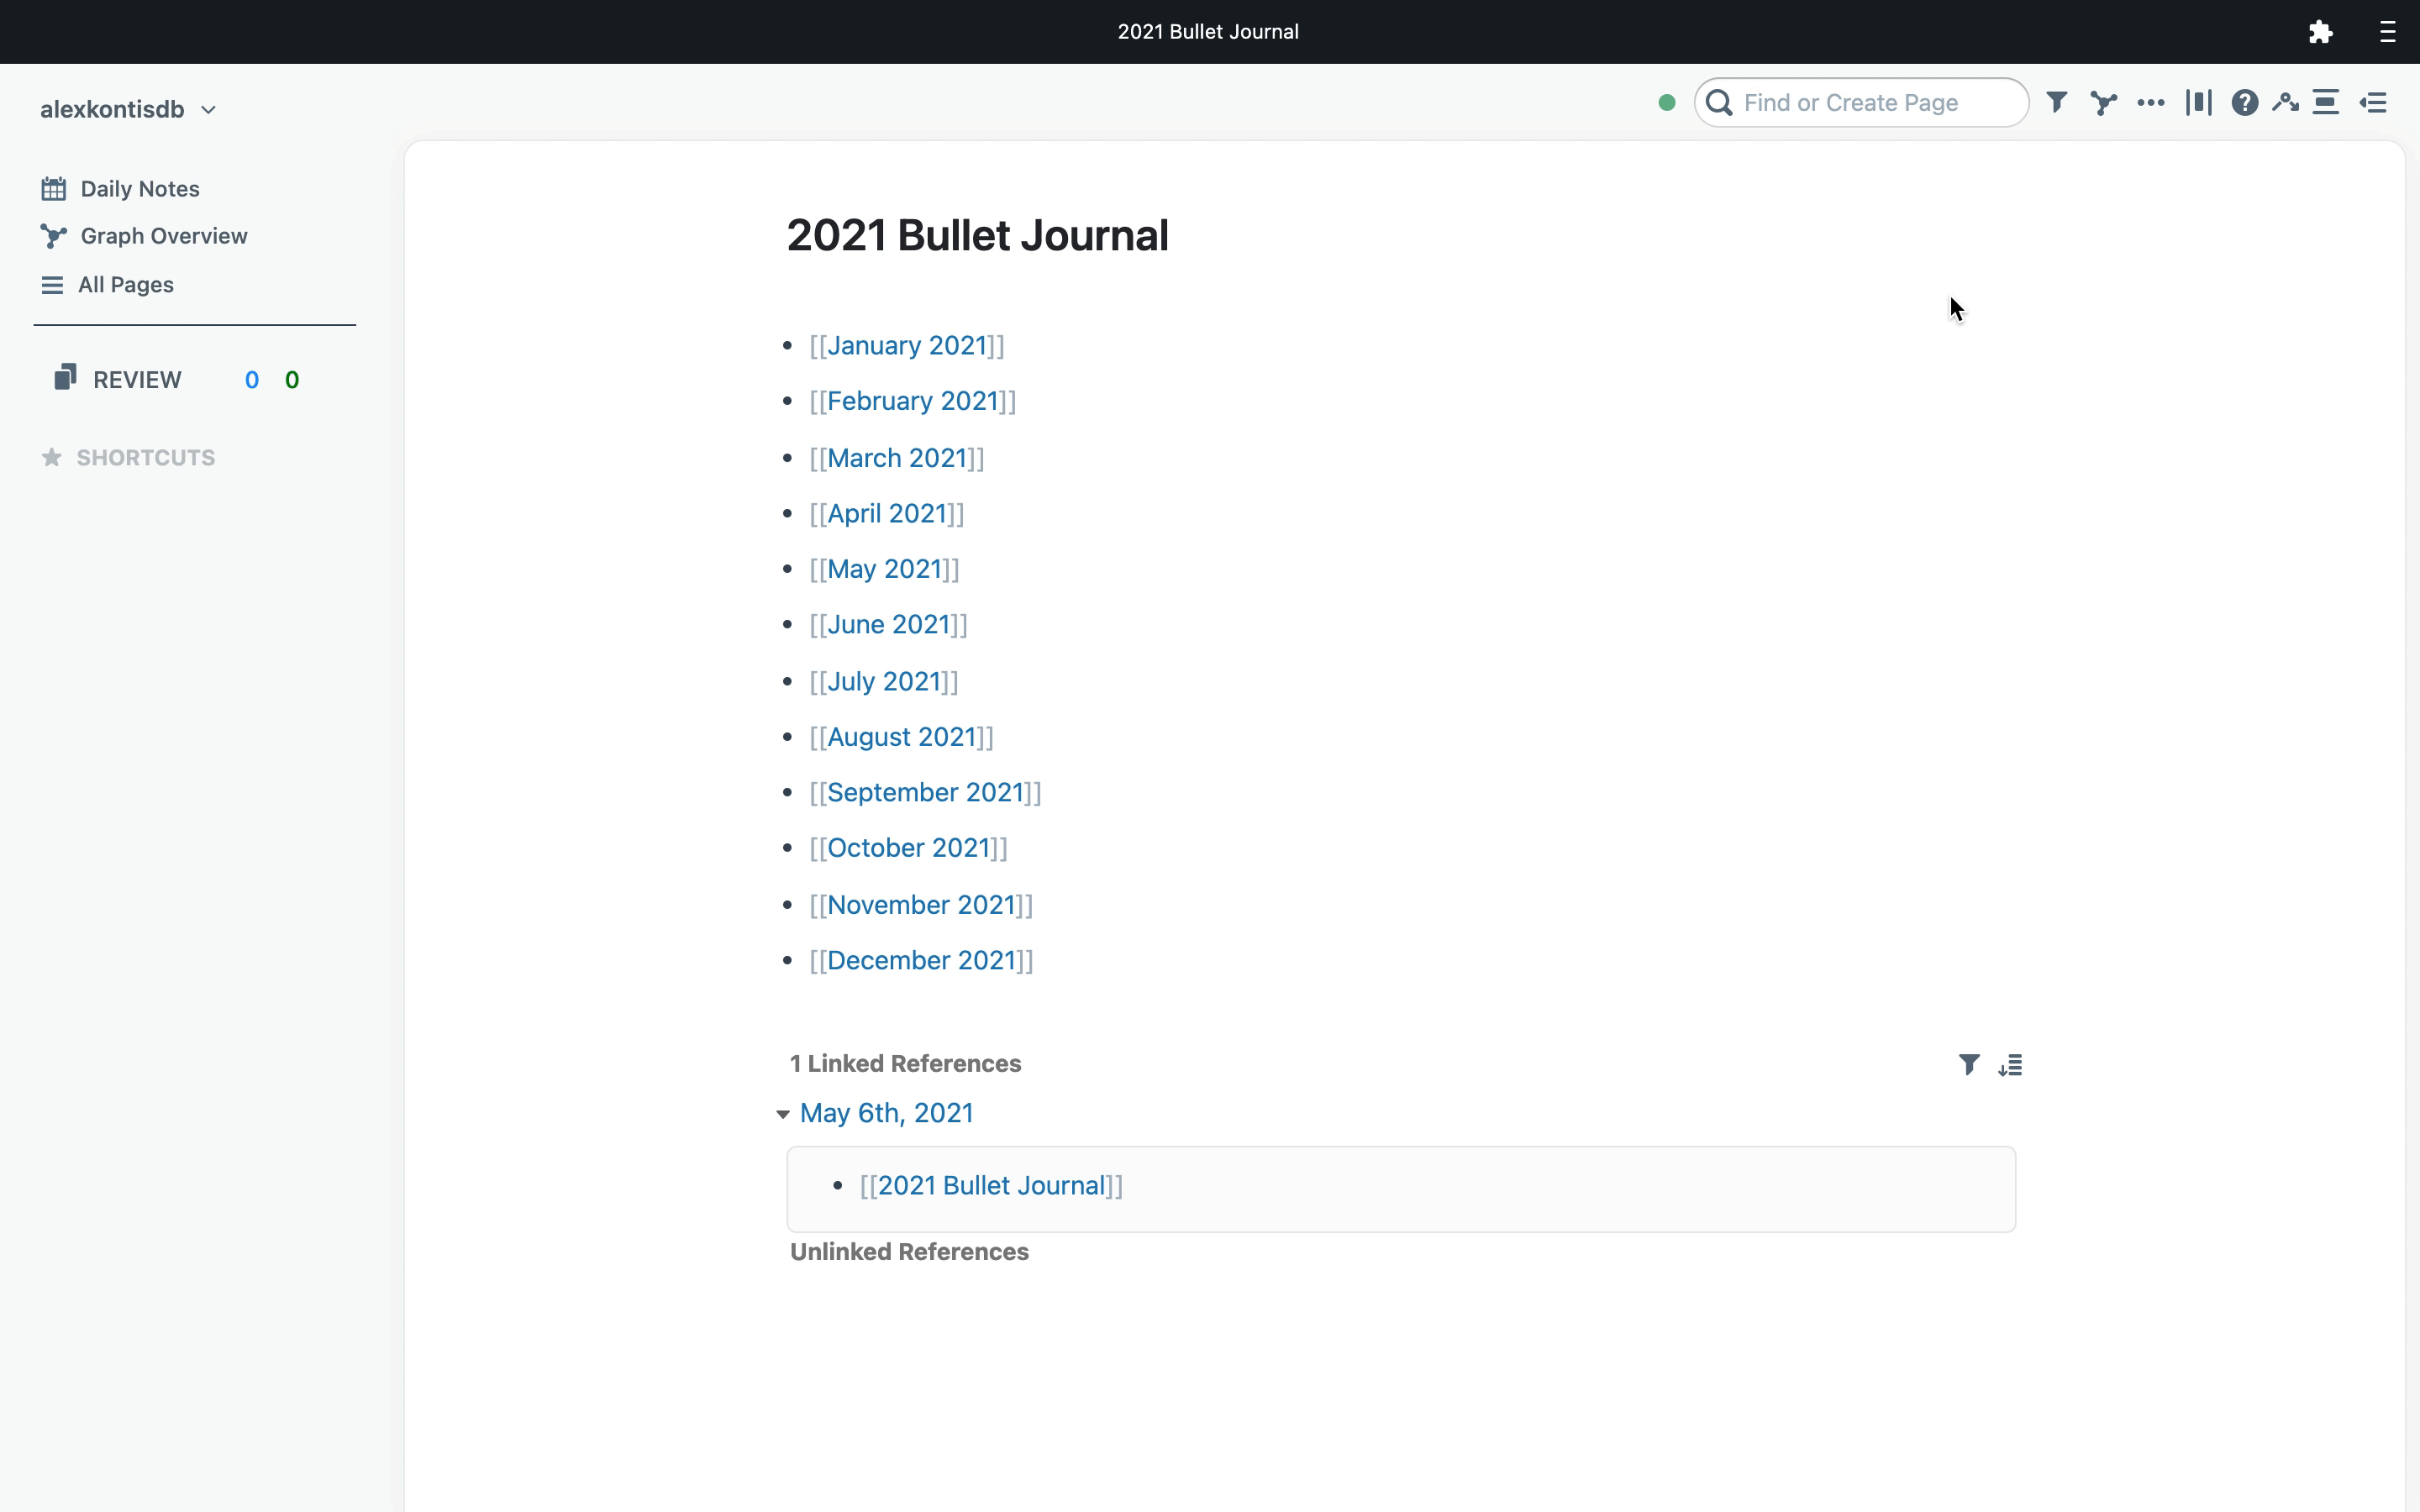
Click through, and you’ll be presented with a blank page to populate with each month. Each of these becomes a page that you can click through to and fill in with anything you would write in your notebook’s Future Log.
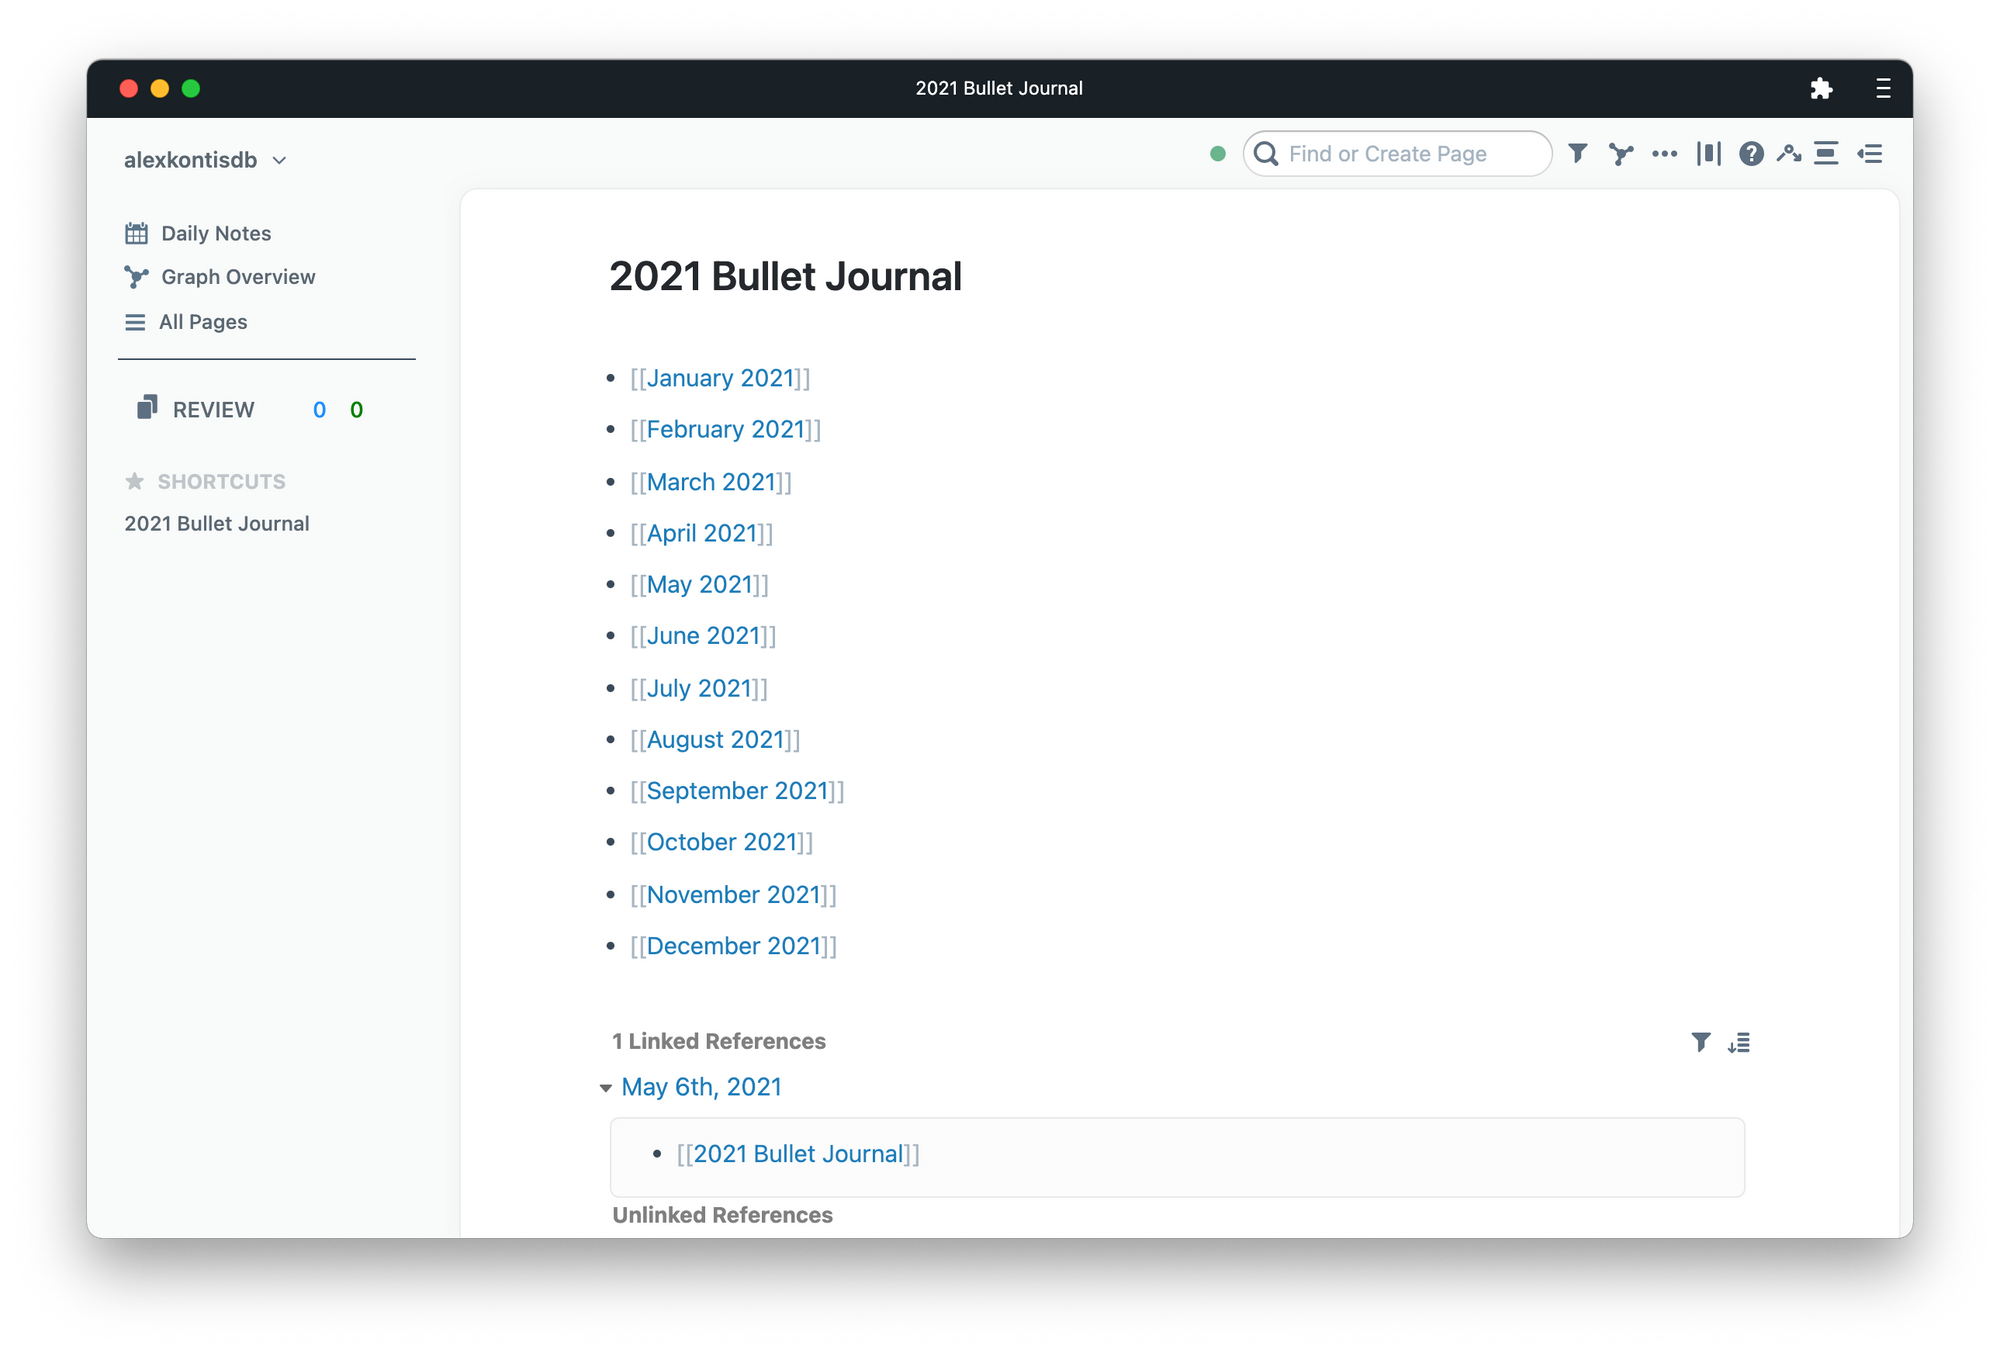
Notice that towards the bottom of the page there’s 1 linked reference. That’s a link back to the DNP where you started and is Roam’s bidirectional linking in action. More on that as we work through.
That’s really all there is to do to set up a Bullet Journal in Roam.
If you want quick access to this page, I’d recommend adding it to your shortcuts, which you can also do with any page in Roam.
At this point, feel free to go through each month and fill in anything that you’d put in your notebook’s Future Log.
If you want to assign a date to an event, type / and scroll to the Date Picker.
Using Roam as your digital Bullet Journal
Now that everything’s set up you’re ready to start using Roam just like your notebook.
I mentioned before that the only opinion Roam has is the DNP and to think of it as a ready-made Daily Log but with all the digital powers you could hope for.
Since everything that’s written in Roam takes the form of a bullet list, it should seem familiar to the rapid logging process used in the Bullet Journal.
From the DNP you can start rapid logging anything and everything that you normally would as you go through your day.
So, let’s imagine you’re going through your day using Roam.
In the morning, you’d sit down at your blank DNP and quickly type out anything that needs to be done that day.
Probably the most important hotkey to know in Roam is / to bring up a dropdown of options.
For Bullet Journal-ers, one you’re likely to use a lot is TODO, for obvious reasons.
You can quickly create tasks in Roam by either using the dropdown menu or by typing ⌘ + ↩︎ and then again to mark it as done.
By the end of the day you’ll have a list of notes, tasks, ideas, and thoughts that need to be migrated and organised.
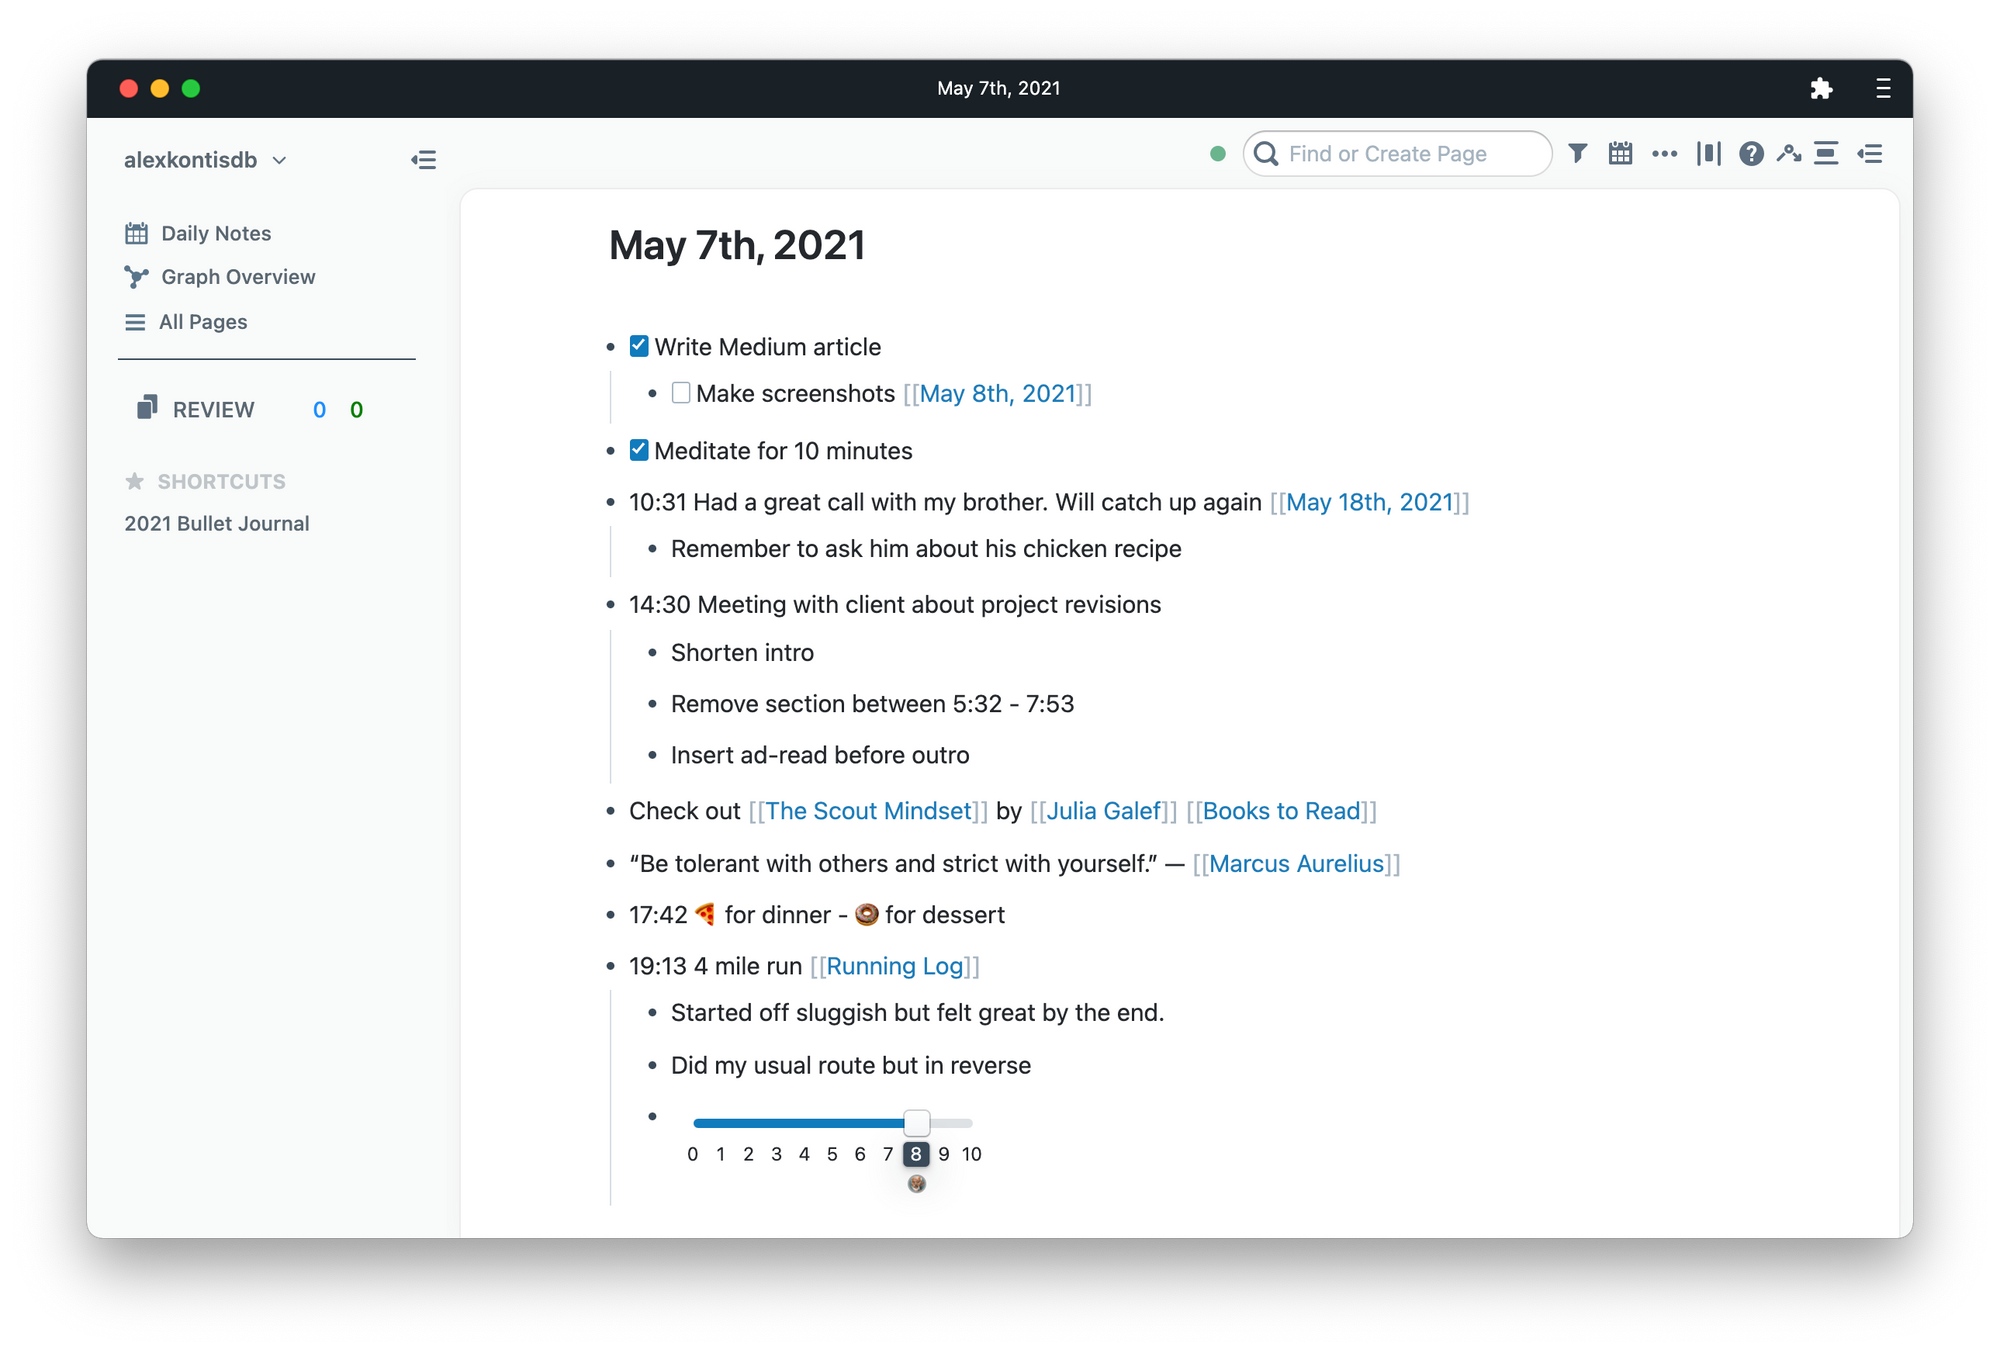
Here’s an example list that I’ll work through

Migration in Roam
If you’re not familiar, migration is the process of reflecting on what you’ve written in your Bullet Journal, deciding if it’s still relevant to you, and migrating it to an appropriate location, be that the next day, a month in the Future Log, or a specific collection page such as a work project or a list of books to read, for example.
Let’s imagine that it’s the end of the day, and you’re doing a reflection and deciding where to migrate the things that you’ve rapid logged throughout the day.
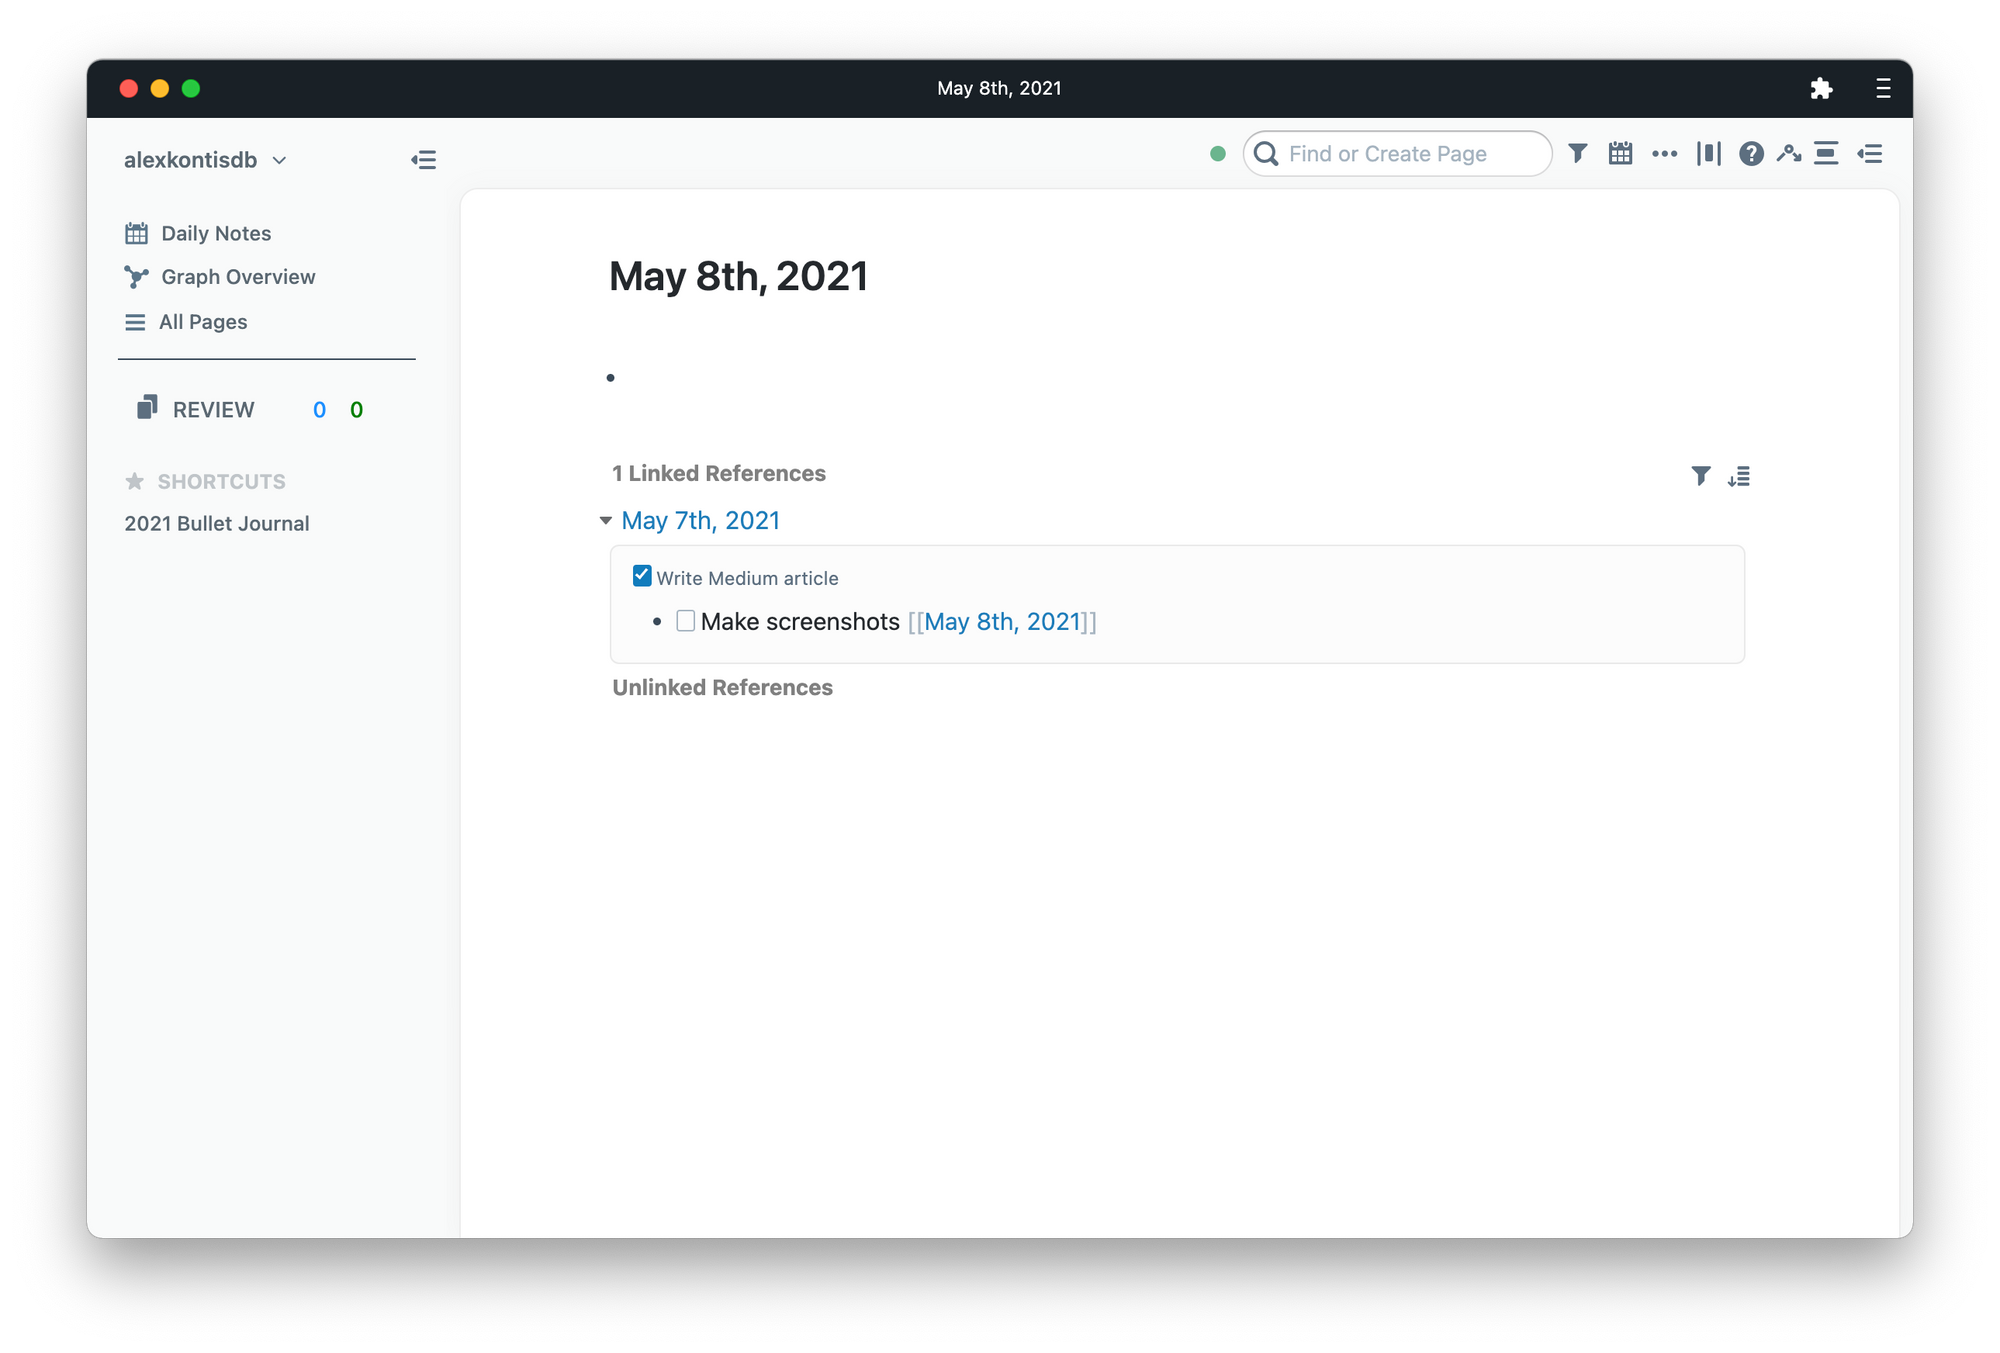
I’ll start with the date-specific options. By typing /tomorrow the task or note will have a reference to the following day applied to it.
In the example list, I’ve added the following day to the Make screenshots to-do.
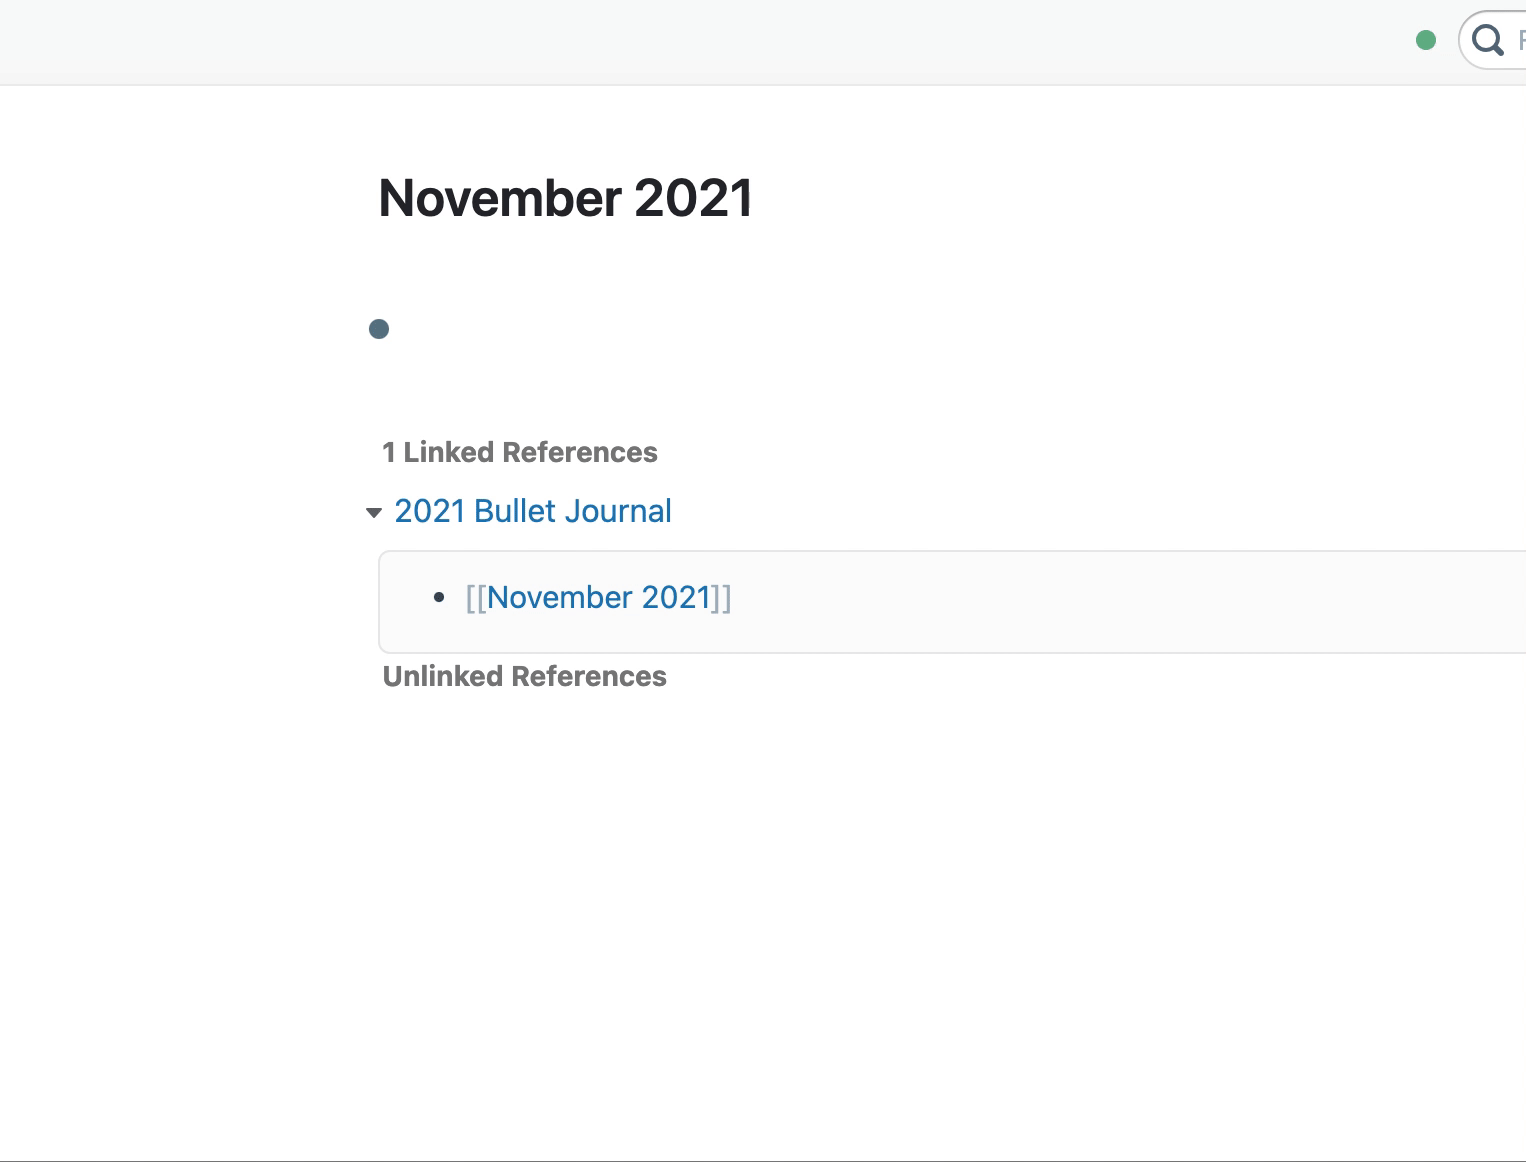
Then, when you come to that next DNP, the task or note will appear under the linked references section without you having to retype, move, or copy and paste it.
If you want to migrate something to a future date, type /date, select the Date Picker, and choose the date you want that bullet to appear on.
Migrating to a specific date makes a lot of sense. It’s like giving yourself a reminder without a notification pop-up. The item you’ve migrated will be waiting for you on the DNP that you link it to.
Collections in Roam
Let’s imagine that you want to move your items to different collections. This is where Roam’s page references come in.
You’ve already been using page references, perhaps without even realising it. Anything that’s wrapped in double bracket [[ ]] is a page reference.
Each of those dates that you linked to is a page reference. The Bullet Journal that you set up at the beginning is a page reference and all the months you filled in as the Future Log are all page references.
Page references are the synapses of Roam’s bi-directional linking. They’re what connect multiple pages and are an incredibly powerful feature.
Back to our collections. When you start typing [[ you’ll be presented with a dropdown to search for a page. If it’s already in your Roam database you can link to it. If it’s not there, type the name you want to give it and hit enter. You just created a new page and a reference to it.
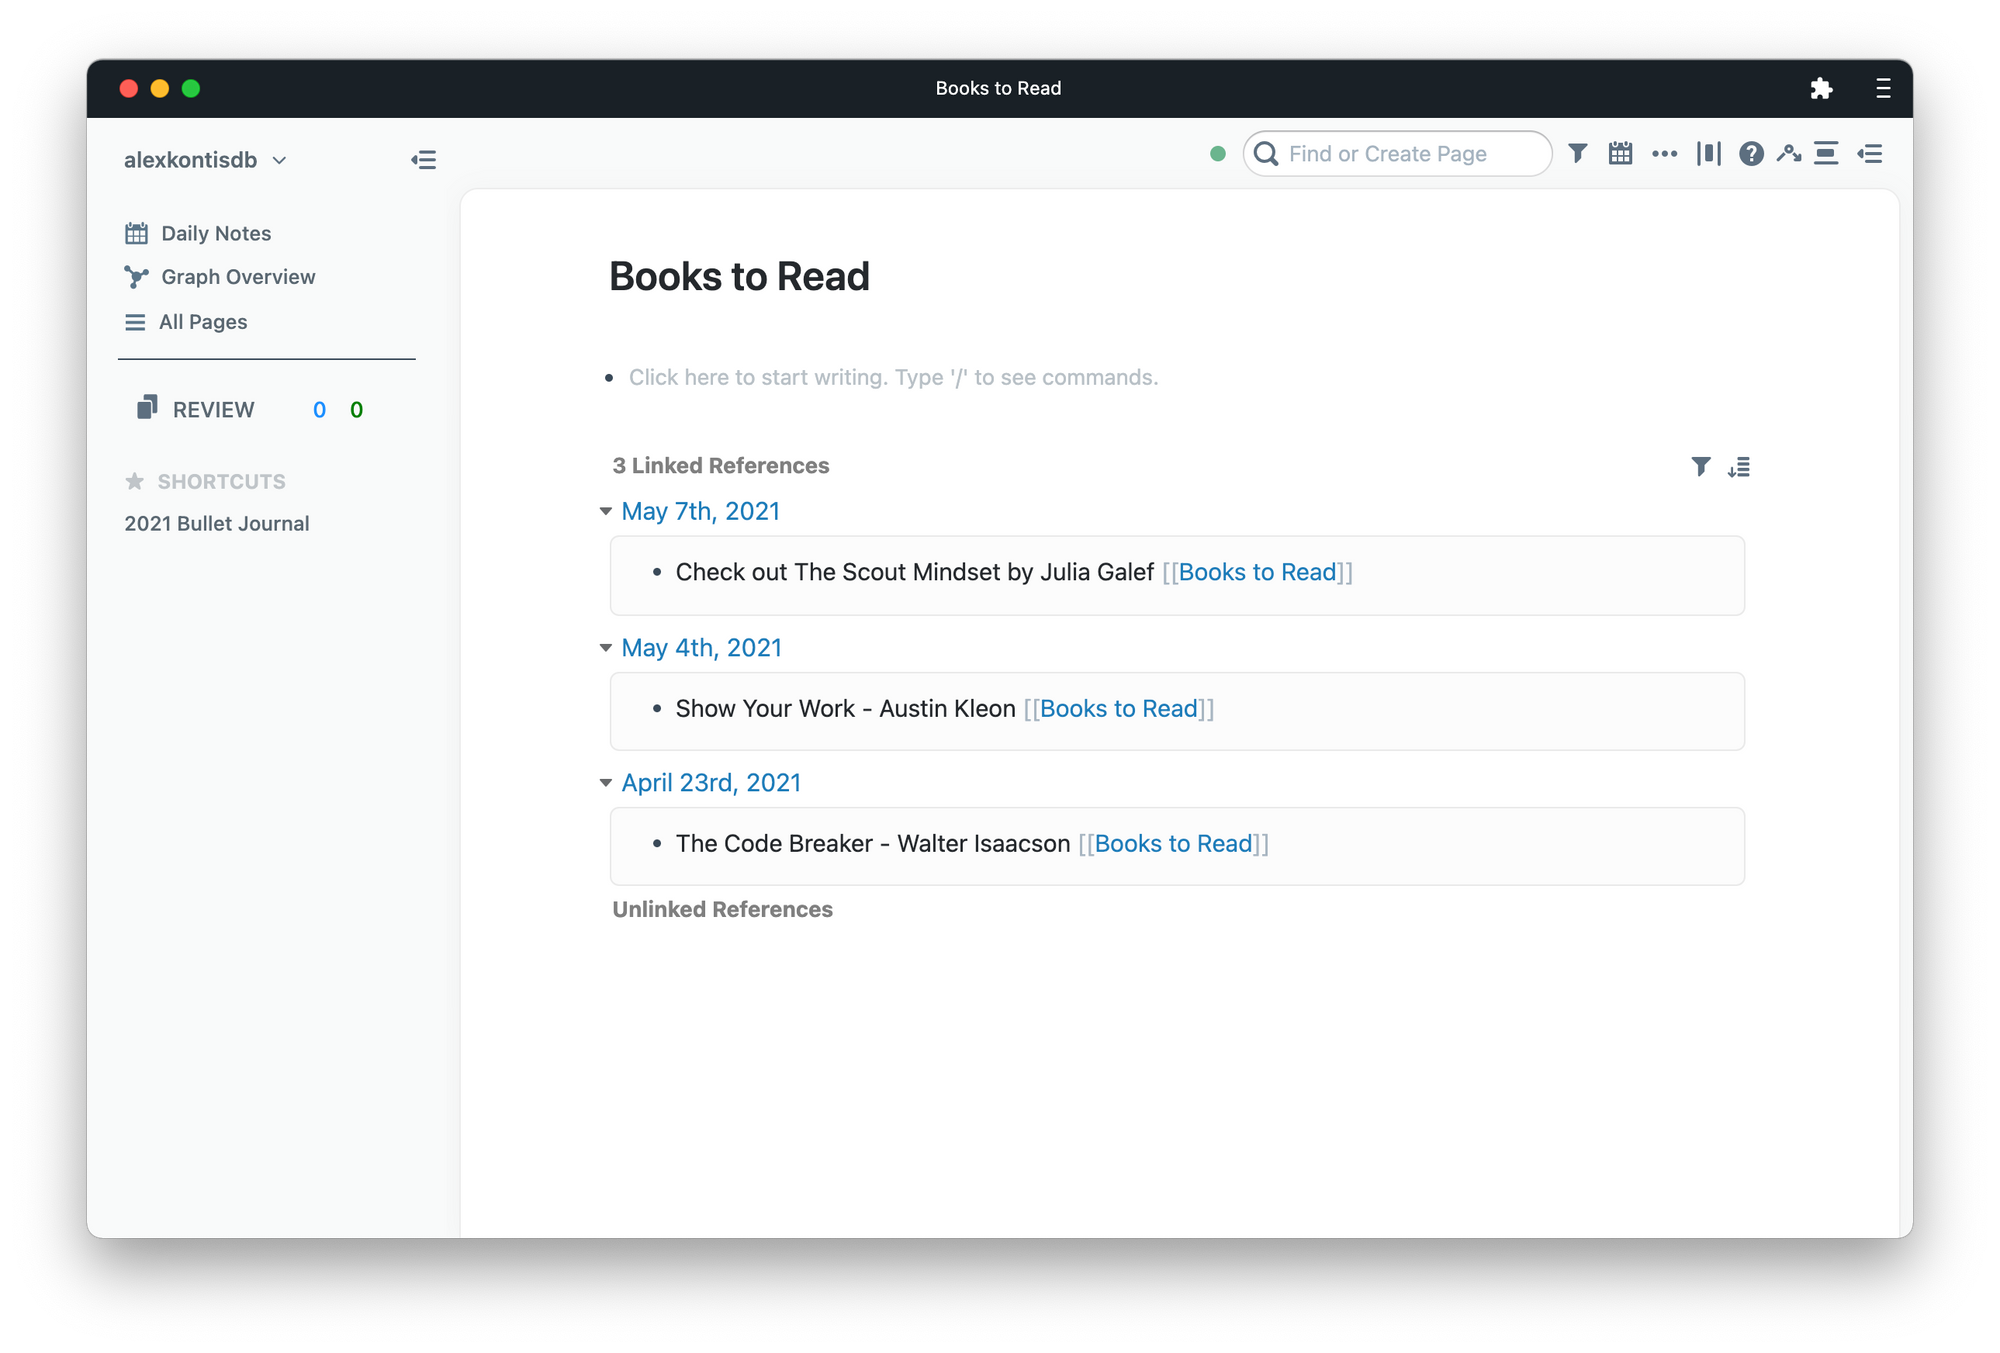
In the example list, I’ve made a note of a book that I want to check out. In my notebook I’d migrate that to a Books to Read collection by rewriting it and then marking the original note with the migration label >.
In Roam all I’ve done is type out the page reference [[Books to Read]] and it appears as a linked reference with a bunch of other books that I’ve referenced.
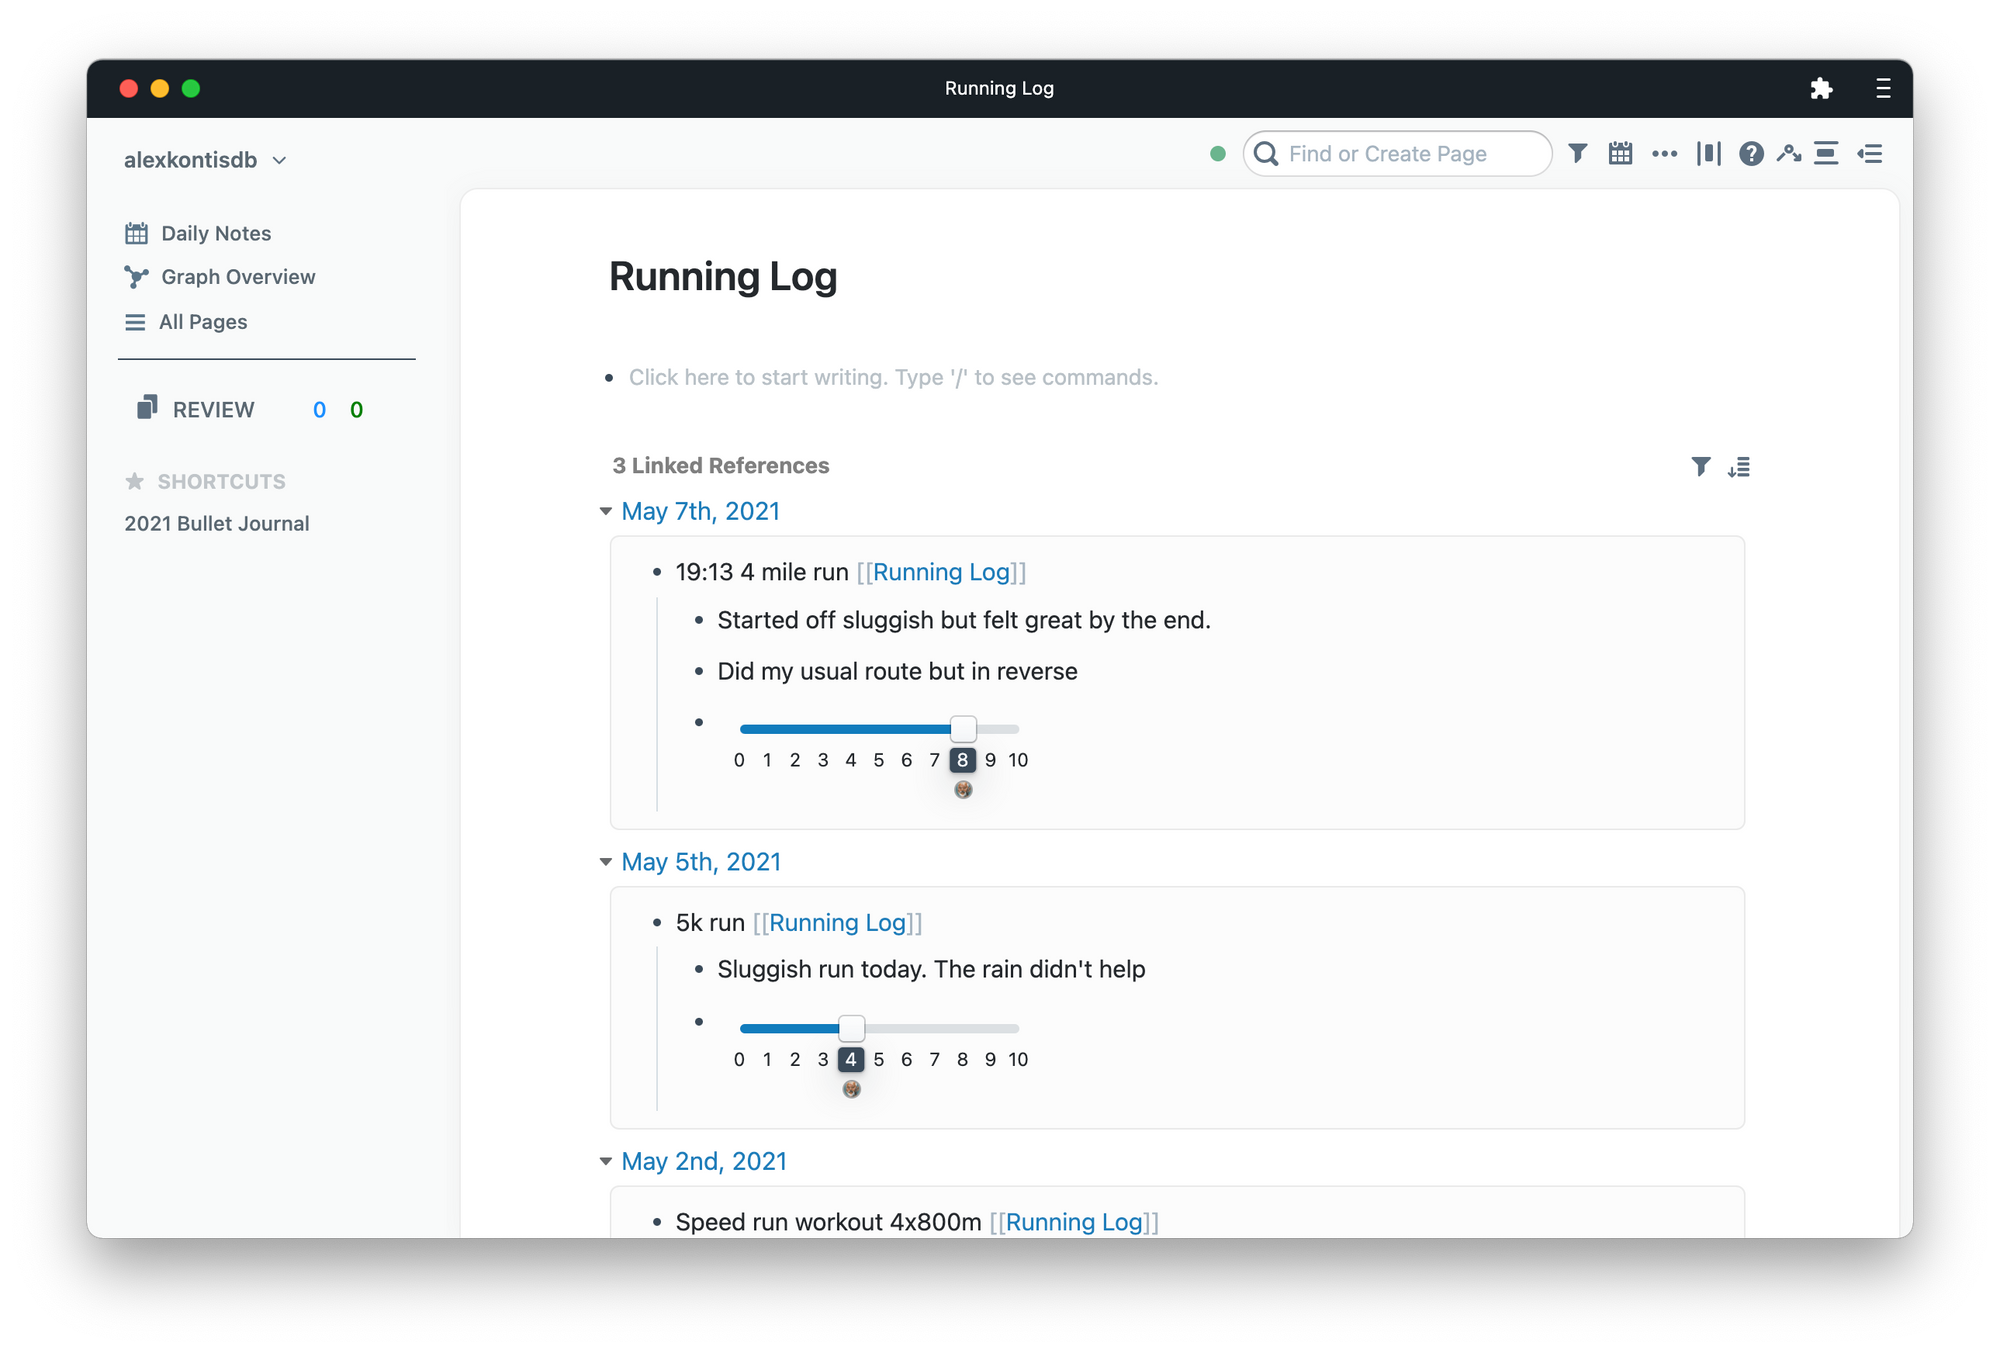
Apparently, I also went for a run on this day, and so I can add it to my running log by, you guessed it, adding [[Running Log]] to the note.
I’ve also added in some comments so that I can keep a lightweight record of how my runs went and grade them out of 10 with the /slider command.
These two examples illustrate just how powerful Roam’s page references are and how efficient they make working with your own personal information.
At the end of the migration process I’ve created a bunch of other page references to dates, collections, and names, all with the purpose of creating links between pages that I otherwise wouldn’t be able to recall.
If this was in my physical notebook I’d have had to write and rewrite these by hand, perhaps include page numbers to thread together disparate references.
In Roam this isn’t necessary since you write a note once, add a page reference, and it appears where you need it without the need to rewrite.
Round Up
Hopefully, this has been a helpful introduction to Roam and how to use it as a Bullet Journal.
Roam’s feature set goes far beyond what I’ve covered here and there’s a passionate community of users that have created loads of extensions to further Roam’s capabilities.
I’m @lexkon on Twitter if you want to say “hi!” 👋 and, if you enjoyed this post, please share it with a friend or on social.